Windows Small Business Server (SBS) was around for a number of years, and proved a firm favourite for many small and medium-sized businesses. The latest version, SBS 2011, is also the last as Windows has now replaced SBS with Windows Server 2012 Essentials. Essentials offers similar functionality, but without Microsoft Exchange.
SBS 2011 is no longer available to purchase, but for those who still use it I have put together a few tips to help you make the most of Microsoft's hidden gem, including Active Directory, user accounts and the importance of the SBS console.
If you have previous experience with Windows Server and Active Directory, you might think that the best way to go about creating a new user account would be through the Active Directory console, but in SBS 2011 there is a better way.
Creating a new user in SBS is really easy. Simply launch the SBS console and click on the Users and Groups tab. Over to the right-hand side under User Tasks you will see the option 'Add a new user account'. Click that, and fill in the relevant fields.
Remember, the console in any version of SBS is designed to make things easier, and if you bypass this console you might find yourself having to do extra work later on.
So what happens if I've already created the user account in Active Directory, or migrated the user accounts from another server?
Don't worry! The user accounts will still work fine, and the associated mailboxes will be fine too, but here's how to add the existing user accounts in to the SBS console.
Within the SBS console, go to the Users tab under Users and Groups and click on Change user role for user accounts.
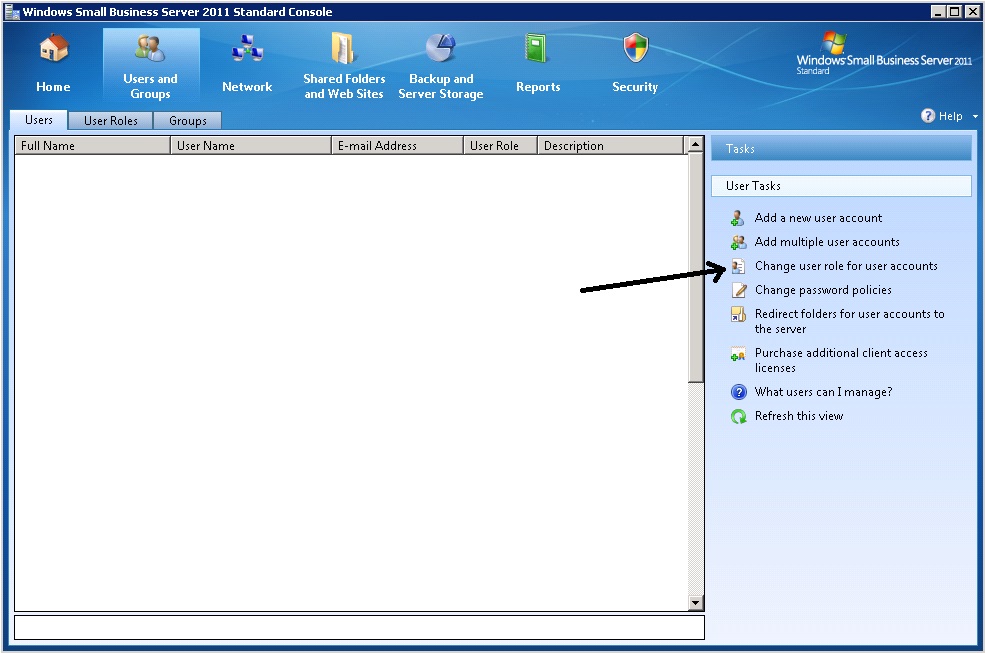
Now choose the role that you want to assign to the user account, and choose whether you are replacing or adding permissions. Click the tick box next to the user account you want to add and click the Add>> button. All you need to do now is click the Change User Role button to finish.
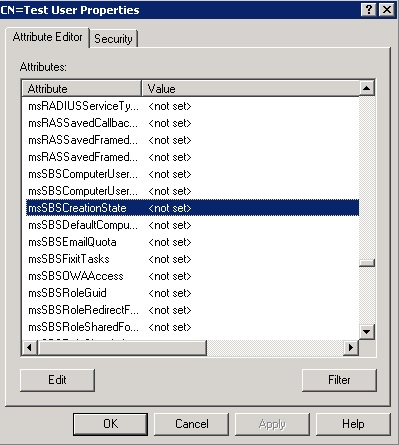
You can also fix this by using ADSI Edit in Administration Tools which you can launch from the start menu. Once you're in ADSI Edit, right click on ADSI Edit at the top and choose Connect To, and click OK once you've filled in the Default naming context field. You can leave the default value if you wish.
Next, browse to the OU where the user is located and right click on the user and choose Properties. The attribute you need to edit is calledmsSBSCreationState. Double click on the attribute and change the value from to Created and click OK.
When you refresh the user account list on the SBS console, the account should now be visible.
Why does the user account need to be in the SBS console?
It's best practise to use the SBS console wherever possible, this includes things like password policies too.
Using the SBS console, you can check user account storage quotas, file permissions, remote access and policies such as folder redirection.
I hope this has been a useful guide.