SMTP Address matching doesn't work because SMTP address already exists in Cloud.
I recently dealt with an issue with Office 365 and the Directory Synchronisation tool where one of the users who had been previously syncing to Office 365 with no problems after a few months started to receive the error "Invalid Soft Match" when synced.
The Error Description was: "Unable to update this object because the following attributes associated with this object have values that may already be associated with another object in your local directory services. [ProxyAddresses SMTP:user@domain.uk.com] Correct or remove the duplicate values in your local directory." After checking for duplicate values on other objects in the directory, we came to the conclusion that there were none. Immediately we knew that it wasn't this and so started to look at other potential glitches that could be causing the error.
After a few days of research into what could be the cause and being completely baffled as to why they didn't match up as expected, I had a brainwave. Obviously the user in the Office 365 portal had a status of "In cloud" and the one locally in Active Directory that we wanted to Sync with matched up in terms of Attribute values. I thought that maybe the DirSync tool saw these as completely separate accounts rather than being one synced account, meaning that the error we were receiving would mean that the values are being associated elsewhere.
Having read through many forums and not getting a definite answer, I came across what was called an "ImmutableID". This is the link between a synchronised Office 365 object and the corresponding local AD object. My first instinct would be to check to see if these were the same, if so, why weren't they talking to each other? Could I remove the ID and re-sync allowing them to see each other again? Yes, and this is exactly what I did to fix this and here is how.
Step 1 - Connect to Office 365 via Powershell
Download and Install the "Windows Azure Active Directory Module for Windows Powershell" (available here)
Run the following commands (make sure you have the credentials for a global administrator for the Office 365 subscription)
1. Import-Module MSOnline
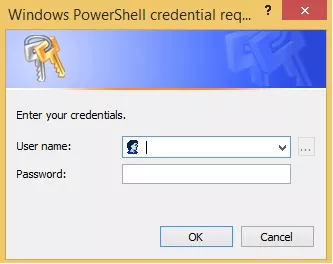
2. $O365Cred = Get-Credential (You will be prompted with a username and password box, you must enter the global administrator credentials)

3. $O365Session = New-PSSession -ConfigurationName Microsoft.Exchange -ConnectionUri https://ps.outlook.com/powershell -Credential $O365Cred -Authentication Basic -AllowRedirection
4. Import-PSSession $O365Session
5. Connect-MsolService -Credential $O365Cred
If everything has been inputted correctly, you should now be successfully connected to Office 365 via Powershell.
Step 2 - The Magic of Powershell
Again, we need to run some more commands. Complete the commands and instructions as follows:
1. Get-MSOLUser -UserPrincipalName user@domain.uk.com | Select ImmutableID
You should be presented with an ID in the format of some random letters and numbers, something a little like this "93eHJhVcF0KgH567"
2. Set-MSOLUser -UserPrincipalName user@domain.uk.com -ImmutableID "$null"
This essentially nullifies the users connect between the Local Active Directory and Office 365
Be sure to leave the connection available as we will return to this shortly.
Step 3 - Sync time - one step closer
Manually kick off a sync on the DirSync Server if you don't want to wait (up to three hours with default settings): C:Program FilesWindows Azure Directory SyncDirSyncConfigShell.psc1
Run the following command: Start-OnlineCoexistenceSync
In my case it didn't always match the accounts and was required to perform a Full DirSync (on DirSync server): Via MIISClient, Management Agents:C:Program FilesWindows Azure Active Directory SyncSYNCBUSSynchronization ServiceUIShellmissclient.exe
On the Windows Azure Active Directory Connector: Properties>Run>Full Import Delta Sync
On the Active Directory Connector: Properties>Run>Full Import Full Sync
If everything in the previous steps has been followed correctly, you should no longer receive an "Invalid Soft Match"
Note: A Full Sync can take a long time if you have a lot of objects. Furthermore, changes can take a while to propagate in Office 365.
Step 4 - Let's see if this works.
Re open the connection to Office 365 via Powershell and run the following command:
1. Get-MSOLUser -UserPrincipalName user@domain.uk.com | Select ImmutableID
If everything went to plan we should get the same ID as before.
Voila! You have successfully removed the forever annoying "invalid Soft Match" error.
If anyone had this problem and fixed it in a different way, please be sure to leave a comment below and let me know. Similarly, if you have tried the steps above and are still having issues feel free to leave a comment.
