The following applies to : Windows Server 2008 R2, Windows SBS 2008 and 2011
Mapping network drives to your computer is a very quick and easy way of accessing your most frequented data quickly. If you want to map drives for your organization, you can do so using this easy guide. This assumes a moderate understanding of Group Policy and Active Directory!
First of all, you need to share the folder which you want to map. To do this, right click on your folder and choose Properties. Next, click on Sharing, then Advanced Sharing.

Choose, Share this folder, and then choose a share name, it can be anything you want, but I'd recommend using a name without spaces (use an underscore "_" instead). Next, click on Permissions, select Everyone and click Remove. Finally, click Add and type Authenticated Users, then click OK. Put a tick in Full Control for Authenticated Users as such:
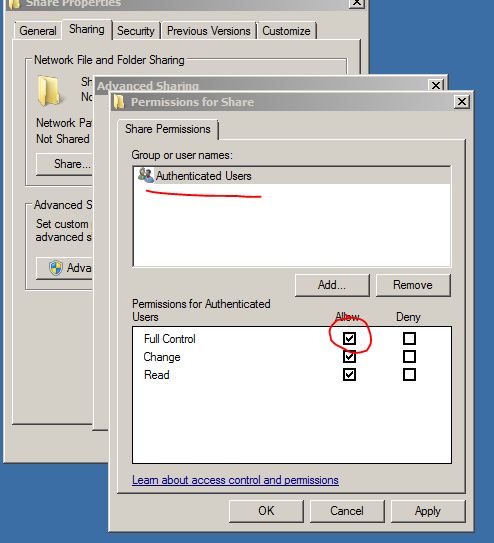
Click OK, and then OK again to get back to your Properties windows. Click on the Security tab, and choose Edit. Click Add and add the users or groups into here, with the relevant level of control according to your company policies.
For best practices and a better understanding of Active Directory Groups, see;
http://technet.microsoft.com/en-us/library/cc776995(v=ws.10).aspx
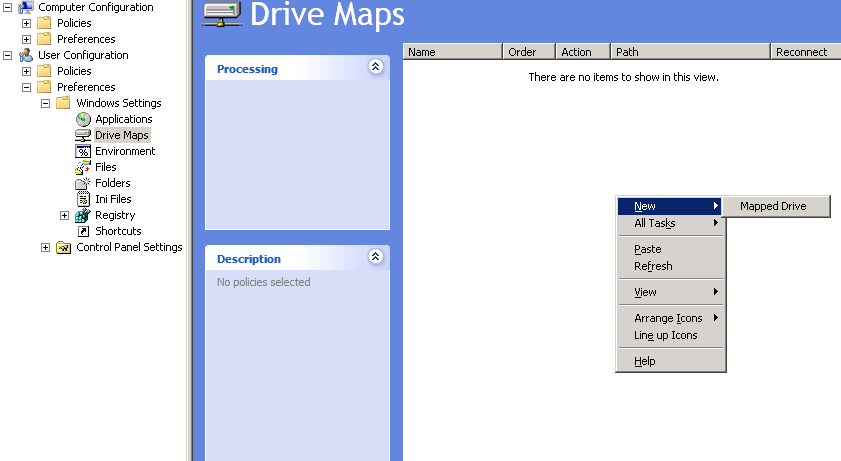
Next, open the Group Policy Management console from Administrative Tools on your server. Choose the Organizational Unit you want to map the drive to, right click, and choose Create a GPO in this domain, and Link it here...
Give your GPO a name, and then click OK. Right click on your newly create GPO and click on Edit.
Go to: User Configuration / Preferences / Windows Settings / Drive Maps
Right click and choose New > Mapped Drive
In the pop-up window that appears, under the General tab, choose Create for your Action. Next, copy and paste the location of your share folder into the Location field, such as;
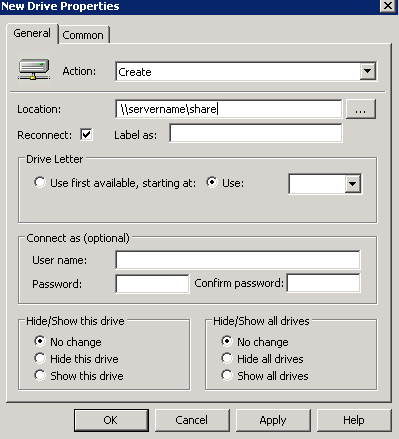
Tick the Reconnect box, and choose a Label (a name) for your new drive. Next, choose a Drive Letter (either the first available, or specify your own). Finally, fill in the optional sections at the bottom; you can choose to connect to the drive as a different user, or hide the drive.
That's it! If you want the changes to update straight away, run gpupdate /force on your File Server and instruct your user to log off and back onto their computer, the new drive will be under My Computer.


