Having trouble adding calendar permissions on Office 365? Unlike on-premise exchange, there is nowhere in the GUI to change the permisisons.
This guide will show you how:
Step one - Connect to Office 365 via Powershell
Download and Install the "Windows Azure Active Directory Module for Windows Powershell"
Run the following commands (Please make sure you have the credentials for a global administrator for the Office 365 subscription)
1. Import-Module MSOnline
2. $O365Cred = Get-Credential (You will be prompted with a username and password box, here you must enter the global administrator credentials)
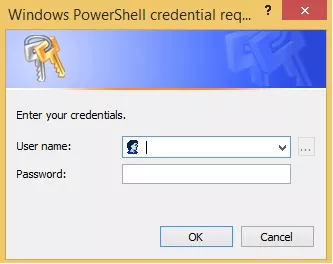
3. $O365Session = New-PSSession -ConfigurationName Microsoft.Exchange -ConnectionUri https://ps.outlook.com/powershell -Credential $O365Cred -Authentication Basic -AllowRedirection
4. Import-PSSession $O365Session
5. Connect-MsolService -Credential $O365Cred
Fingers crossed everything went right, you should now be successfully connected to Office 365 via Powershell.
Step two
Rather than assigning calendar permissions per user, for ease of access and manageability we are going to do it via group.
For example, User 1, 2 and 3 need access to the Boardroom calendar as a Publishing Editor, if we associate these three users into a group, we only have to run 1 PowerShell command on that group rather than three individual ones for each user. This also means that if User 4 then decides they need access, we can simply add them into the group rather than having to connect back up to Office 365 to re run the PowerShell command for that one user.
We will continue to use Boardroom with Publishing Editor permissions for the duration of this article. (PE - abbreviated for Publishing Editor)
A client has asked for 10 users to have Publishing Editor permissions to the Boardroom Calendar.
If your domain has been directory synchronised to the cloud then we must log onto the server in question and access their Active directory.
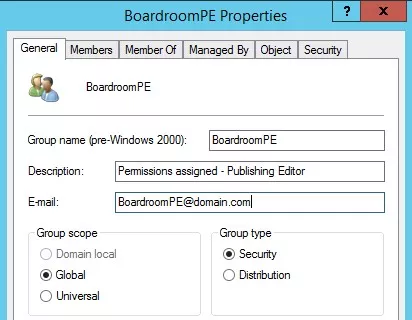
Create a Security Group with a friendly name, I would suggest ‘Boardroom Publishing Editor' make sure to add a description and an email address, I would suggest something like - "BoardroomPE@domain.com. Making sure to add the users you would to have this permissions into this group.
Step three
Now we must DirSync to Office 365 so that the users exist in the cloud. If you have DirSync installed on the server.
Manually kick off a sync on the DirSync Server if you don't want to wait (up to 3 hours with default settings): C:Program FilesWindows Azure Directory SyncDirSyncConfigShell.psc1
Run the following command: Start-OnlineCoexistenceSync
In my case it didn't always match the accounts and was required to perform a Full DirSync (on DirSync server): Via MIISClient, Management Agents: C:Program FilesWindows Azure Active Directory SyncSYNCBUSSynchronization ServiceUIShellmissclient.exe
On the Windows Azure Active Directory Connector: Properties>Run>Full Import Delta Sync
On the Active Directory Connector: Properties>Run>Full Import Full Sync
If everything in the previous steps has been followed correctly, you should no longer receive an "Invalid Soft Match"
Note: A Full Sync can take a long time if you have a lot of objects. Furthermore, changes can take a while to propagate in Office 365.
Step four
To determine which permissions you would like, please use the following.
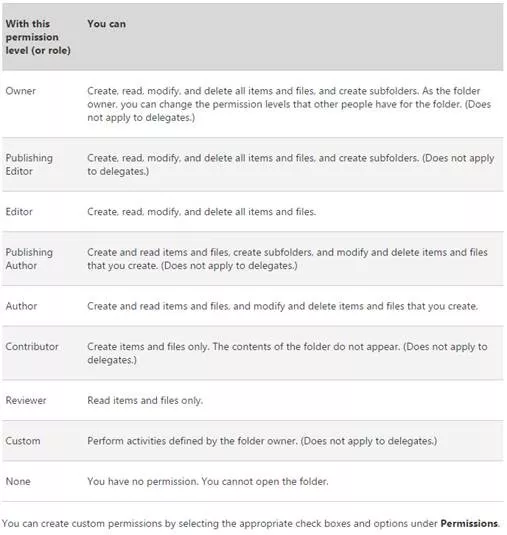
We must now go back to our PowerShell window as we are ready to run the command to activate the permissions on the group. Use the following command - in this instance we will be giving Editor permissions.
Add-MailboxFolderPermission -Identity user1@domain.com:calendar -user user2@domain.com -AccessRights Editor
User 1 is the mailbox you are giving Calendar access to. User 2 is the security group email address you created in Active Directory and DirSync'd containing the users who need access to the calendar.
To test the user must add the Calendar into their Outlook and then modify the calendar based on the permissions they have been granted.

